How to Set up your Gmail account in Outlook 2010 Tutorial

Begin by making sure the settings on your Gmail account are what they need to be.
1) Log in to your G-mail account.
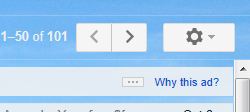
2) Hit the ‘Settings’ icon/button. (This button may say settings or may have an image of a gear like the one shown.)
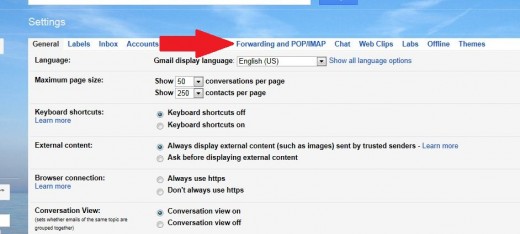
3) The ‘Settings’ page will open.
4) Select ‘Forwarding and POP/IMAP’ from the list across the top.
5) On this new page select ‘enable IMAP’ in the ‘IMAP access’ section.
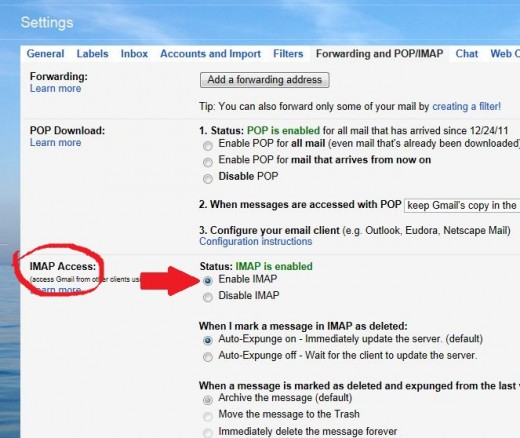
6) Scroll to the bottom of this page click ‘Save Changes’
7) You can close your internet browser.
Now try to connect your Gmail automatically.
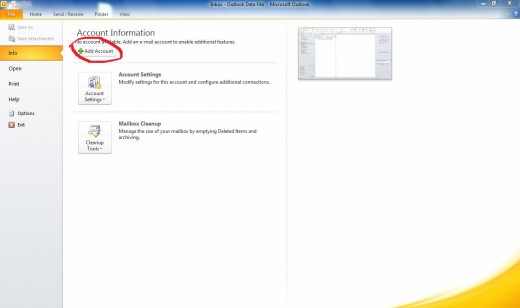
1) Open Outlook then select the 'File' tab close to the top of the screen.(The Home tab will probably be the default tab automatically selected.Click on the File tab to see the screen shown here.)
2) On the File screen select ‘Info’ on the left column of the screen.(Often ‘Info’ will already be selected.)
3) Under ‘Account Information’ select add account.
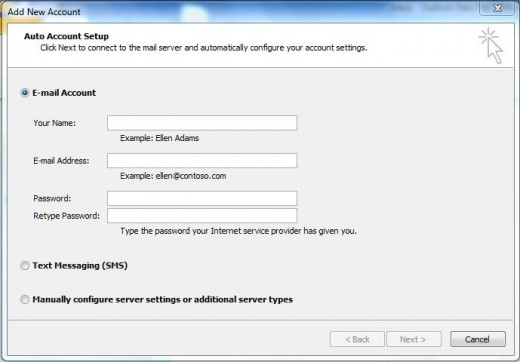
4) The following screen will pop up.
5) Enter the name you want to appear on all outgoing e-mails.
6) Enter your g-mail address, and the password on your g-mail account.
*(This is not a new password but the one already on your account.)
7) Click ‘NEXT’

If the automatic set-up failed try this process.
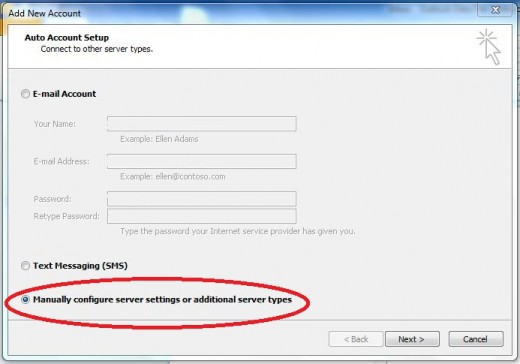
1) Just as before open Outlook then select the File tab close to the top of the screen. On the File screen select ‘Info’ on the left column of the screen. Under ‘Account Information’ select 'add account' and the screen below will pop up.
2) This time select 'Manually configure...'. Then hit 'NEXT'.
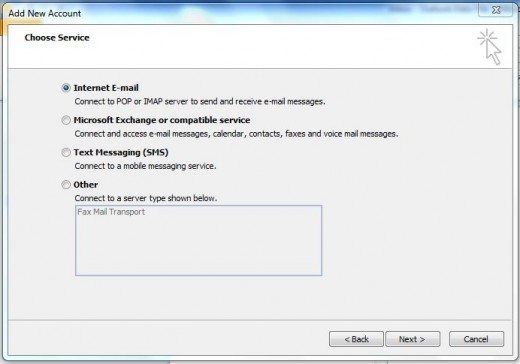
3) Select ‘Internet E –mail’ then hit ‘NEXT’
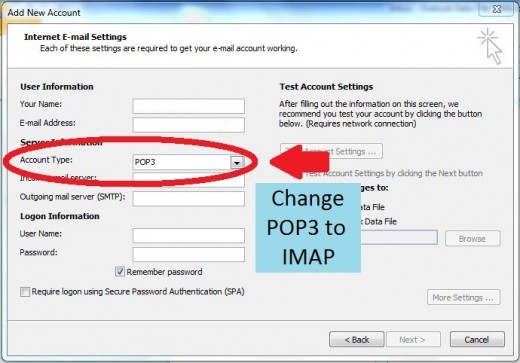
4) Fill in the name you want to appear on your outgoing e-mail and your email address.
5) Select IMAP from the drop down menu.
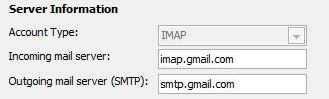
6) Fill in server information as seen in the picture.
7) Fill in your in your password. (This is your current e-mail password not a new one.)
8) Select ‘More Settings’ in the bottom right corner and a new window will pop up..
9) Select the ‘Outgoing Server’ tab in the window and you will see the page below.
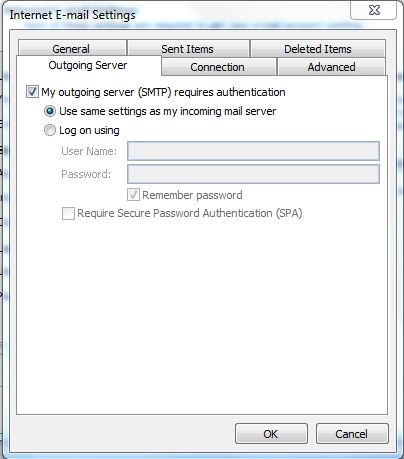
10) On that page Select ‘My outgoing server…’ and ‘use same settings…’
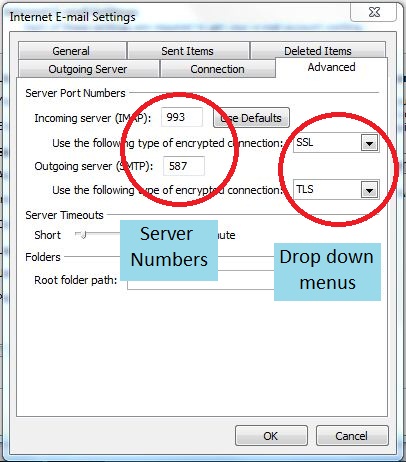
11) Then select the ‘Advanced’ tab
12) Select the proper items from the drop down menus. (Do this first, as doing so will fill in default numbers in the Incoming and Outgoing server boxes.)
13) Fill in the Incoming and Outgoing server numbers if they are not as shown above. (These server numbers can change over time so if the ones here do not work you can try checking for these numbers by going to Gmail Help http://support.google.com/mail/?hl=en and searching IMAP or STMP. If you are running Outlook 2007 or some other program these numbers will likely be different.)
14) You should now be back to the ‘Internet E-mail Settings’ page.
15) Select ‘NEXT’
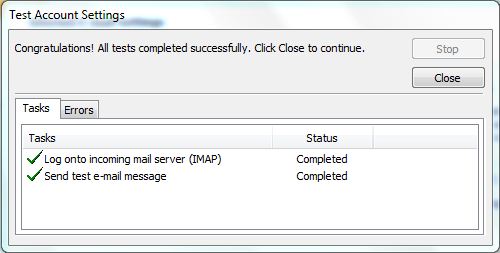
16) During this time your computer will automatically test the account settings. If you have been successful then this screen will pop up.
17) Click ‘Close’
18) Click ‘Finish’ on the final screen.
19) Your outlook ‘Home’ screen will automatically populate with your mail.


